


ChatGLM3-6B 是一个 ChatGLM 系列的开源对话模型,是由清华大学 KEG 实验室和智谱 AI 共同开发。该模型具备出色的中文和英文理解和生成能力,特别适合多轮对话、文本生成、问答等自然语言处理任务。
模型下载:① https://huggingface.co/THUDM/chatglm3-6b ② https://hf-mirror.com/THUDM/chatglm3-6b ③ https://modelscope.cn/models/ZhipuAI/chatglm3-6b/
使用示例:https://github.com/THUDM/ChatGLM3
技术文档:https://zhipu-ai.feishu.cn/wiki/WvQbwIJ9tiPAxGk8ywDck6yfnof
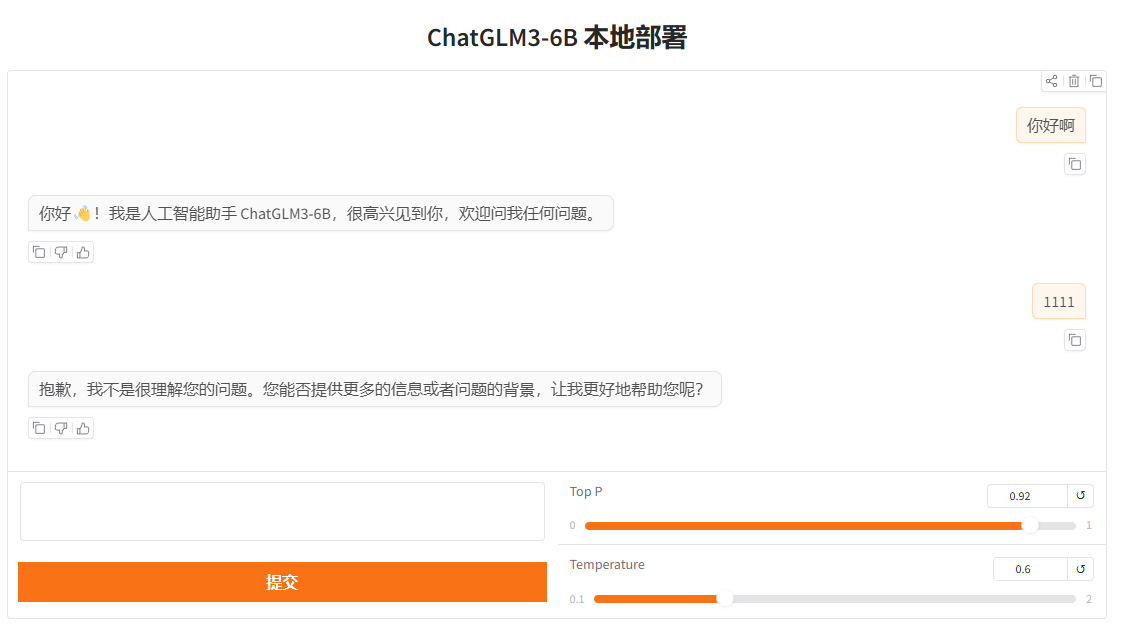
下面我们在本地部署该模型(Windows 11 系统),实现如下效果:
1. 环境准备
官方给出的硬件要求如下:
- Int4 ChatGLM3-6B:
- 内存:8GB及以上
- 显存:5GB及以上
- FP16 ChatGLM3-6B:
- 内存:16GB及以上
- 显存:12GB及以上
创建虚拟环境 ChatGLM-env, 注意:Python 版本要求 3.10 以上。
conda create --name ChatGLM-env python=3.10
本地运行模型推理需要的依赖包(安装的 PyTorch 依赖,我这里下载的是支持 GPU 的版本):
pip install gradio==5.1.0 -i https://pypi.tuna.tsinghua.edu.cn/simple/
pip install transformers==4.40.0 -i https://pypi.tuna.tsinghua.edu.cn/simple/
pip install torch --index-url https://download.pytorch.org/whl/cu121
pip install sentencepiece -i https://pypi.tuna.tsinghua.edu.cn/simple/
pip install cpm_kernels -i https://pypi.tuna.tsinghua.edu.cn/simple/
2. 模型交互
我们使用 transformers 加载模型时,可以根据自己硬件情况加载不同的版本:
# FP16 ChatGLM3-6B
estimator = AutoModel.from_pretrained(estimator_path, trust_remote_code=True).to(device)

# Int4 ChatGLM3-6B
estimator = AutoModel.from_pretrained(estimator_path, trust_remote_code=True).quantize(4).to(device)
完整的代码如下(可直接拷贝运行):
from transformers import AutoModel
from transformers import AutoTokenizer
import gradio as gr
import torch
import warnings
warnings.filterwarnings('ignore')

# torch.manual_seed(0)

device = 'cuda' if torch.cuda.is_available() else 'cpu'

# 加载分词器和模型
estimator_path = 'ChatGLM3-6B'

# FP16 ChatGLM3-6B
# estimator = AutoModel.from_pretrained(estimator_path, trust_remote_code=True).to(device).eval()
# Int4 ChatGLM3-6B
estimator = AutoModel.from_pretrained(estimator_path, trust_remote_code=True).quantize(4).to(device).eval()

tokenizer = AutoTokenizer.from_pretrained(estimator_path, trust_remote_code=True)


def predict(chatbot, top_p, temperature):
    # 获得当前输入
    message = chatbot[-1]['content']
    # 获得以前输入
    history = chatbot[:-1]
    # 增加空回复
    chatbot.append({'role': 'assistant', 'content': ''})

    # 补充空回复
    # 1. 迭代输出
    for response, history in estimator.stream_chat(tokenizer,
                                                   query=message,
                                                   history=history,
                                                    # 用于产生多样性的文本的参数
                                                   top_p=top_p,
                                                   temperature=temperature):
        # response 可能是 str 或者 dict 类型
        # 如果是 dict 类型,需要取出其 content 值
        print(response)
        if isinstance(response, dict):
            response = response['content']
        chatbot[-1]['content'] = response
        yield chatbot

    # 2. 直接输出
    # response, history = estimator.chat(tokenizer, query=message, history=history)
    # if isinstance(response, dict):
    #     response = response['content']
    # chatbot[-1]['content'] = response
    # return chatbot


def user(message, chatbot):
    return '', chatbot + [{'role': 'user', 'content': message}]


def vote(data: gr.LikeData):
    if data.liked:
        print('喜:', data.value, data.index)
    else:
        print('踩:', data.value, data.index)


def main():

    css = '.group{max-width:1100px; margin:0 auto;}.bg{background-color:white;}.btn{padding:10px;background-color:white;}}'
    with gr.Blocks(css=css, title='本地部署 ChatGLM3-6B 语言模型') as app:
        gr.HTML('<center><h1>ChatGLM3-6B 本地部署</h1></center>')
        with gr.Group(elem_classes='group'):
            chatbot = gr.Chatbot(show_label=False,
                                 type='messages',
                                 show_copy_button=True,
                                 show_share_button=True,
                                 show_copy_all_button=True)
            chatbot.like(fn=vote, inputs=None, outputs=None)
            with gr.Row(elem_classes='bg'):
                with gr.Column():
                    textbox = gr.Textbox(show_label=False, lines=2)
                    with gr.Group(elem_classes='btn'):
                        start = gr.Button('提交', variant='primary')
                with gr.Column():
                    top_p = gr.Slider(0, 1, value=0.8, step=0.01, label="Top P", interactive=True)
                    temperature = gr.Slider(0.1, 2, value=0.6, step=0.1, label="Temperature", interactive=True)

        start.click(user,
                    inputs=[textbox, chatbot],
                    outputs=[textbox, chatbot]).then(predict,
                                                     inputs=[chatbot, top_p, temperature],
                                                     outputs=chatbot)

    app.launch(share=False, inbrowser=True)


if __name__ == '__main__':
    main()
这里需要注意的是,运行 Int4 ChatGLM3-6B 时,可能如下报错:
Symbol cudaLaunchKernel not found in C:\Program Files (x86)\NVIDIA Corporation\PhysX\Common\cudart64_65.dll
RuntimeError: Library cublasLt is not initialized
可以尝试去安装较新版本的 cuda toolkit https://developer.nvidia.com/cuda-toolkit 来解决。


 冀公网安备13050302001966号
谢谢您,很有价值