


我们要实现的效果是基于 dify + xinference + ChatTTS + SenseVoiceSmall 实现语音聊天助手:
- 语音输入
- 聊天内容生成
- 语音输出
具体效果如下:
在这个过程中,我们需要做以下几件事情:
- 使用 xinference 在本地部署两个语音模型,一个用于将输入语音转换为文本的 SenseVoiceSmall 模型,另一个是用于将文本转换为语音的 ChatTTS 模型
- 在 dify 搭建一个简单的多轮聊天应用(云模型 API),配置使用本地部署的语音模型进行输入语音识别,以及语音输出
1. 语音模型部署
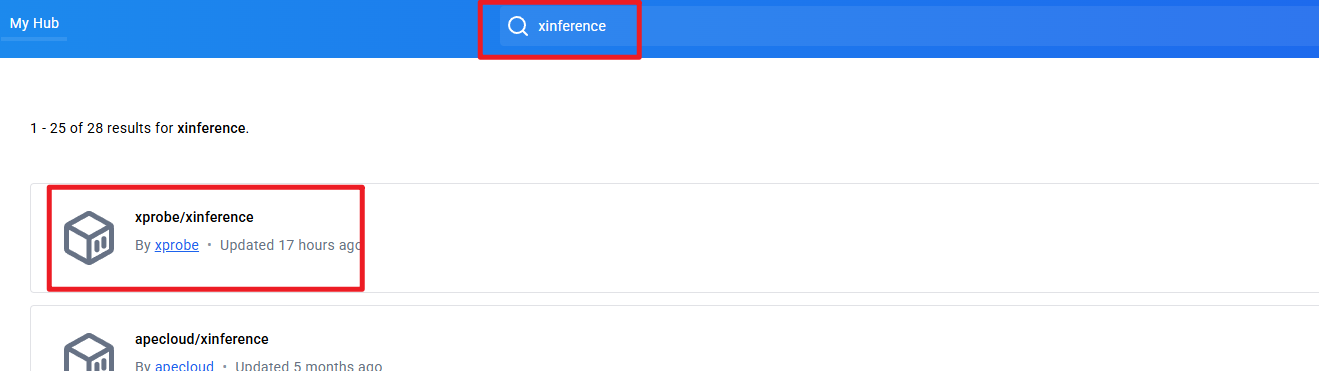
我们通过官方 docker 的方式安装 xinference 镜像。首先打开 docker hub,搜索 xinference,如下图:
https://hub.docker.com/r/xprobe/xinference/tags
然后,下载 v1.5.0 xinference 镜像版本,拷贝右侧的 docker pull 命令,在本地终端拉取该镜像,如下图所示:
docker pull xprobe/xinference:v1.5.0

最后,在终端执行如下命令启动 xinference:
docker run -v C:/Users/china/Documents/xinference_models:/container/models -e XINFERENCE_HOME=/container/models -e LD_LIBRARY_PATH=/opt/conda/envs/ffmpeg-env/lib:$LD_LIBRARY_PATH -p 9998:9997 --gpus all xprobe/xinference:v1.5.0 xinference-local -H 0.0.0.0
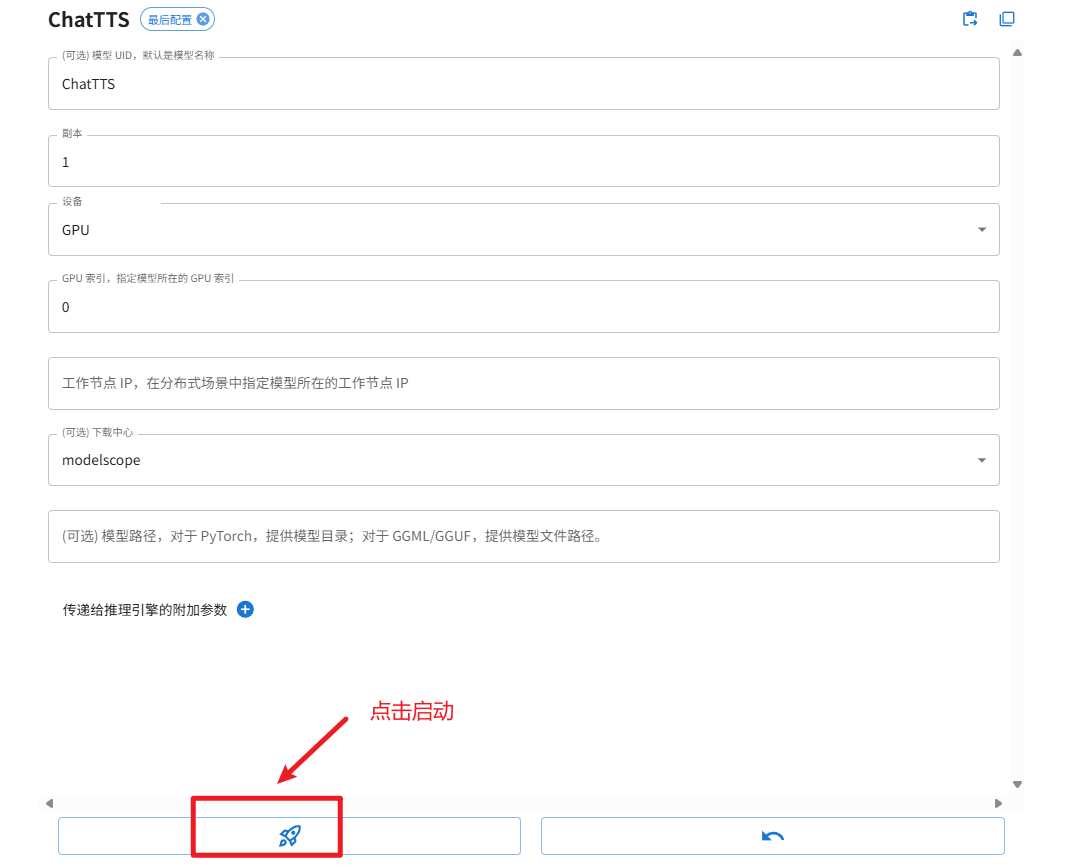
在浏览器输入 https://mengbaoliang.cn:9998/ 打开 xinference web 操作界面。接下来,下载、启动 SenseVoiceSmall 、ChattTTS 模型。具体操作为:在启动模型标签下,选择音频模型,并选择 ChatTTS、SenseVoiceSmall 模型分别下载并自动在本地部署该模型,过程如下面几张图所示:
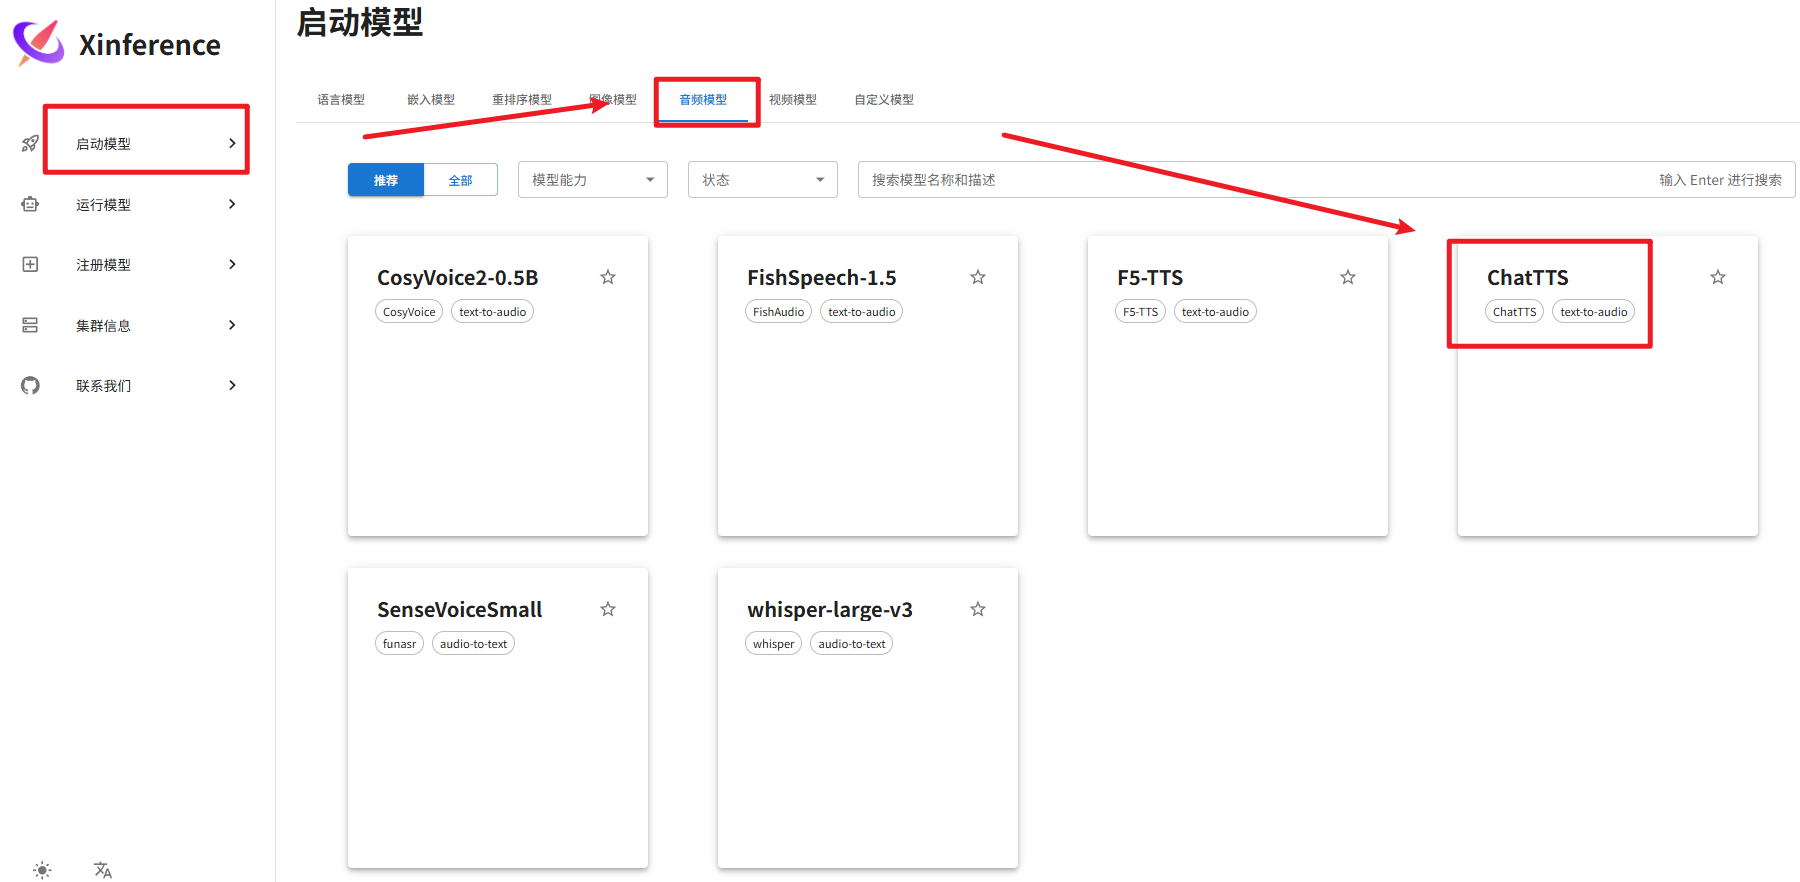
注意:上图首次启动时,需要下载模型,在 cmd 界面可以看到下载进度。按照同样的方法下载和启动 SenseVoiceSmall 语音转文本模型。
2025-04-21 05:10:17,535 xinference.core.worker 38 INFO     [request 96b6ceac-1ea9-11f0-a80d-da53e7ccdb2e] Enter launch_builtin_model, args: <xinference.core.worker.WorkerActor object at 0x798c3f8f0630>, kwargs: model_uid=ChatTTS-0,model_name=ChatTTS,model_size_in_billions=None,model_format=None,quantization=None,model_engine=None,model_type=audio,n_gpu=auto,request_limits=None,peft_model_config=None,gpu_idx=[0],download_hub=modelscope,model_path=None,xavier_config=None
2025-04-21 05:10:17,538 xinference.core.worker 38 INFO     You specify to launch the model: ChatTTS on GPU index: [0] of the worker: 0.0.0.0:57820, xinference will automatically ignore the `n_gpu` option.
2025-04-21 05:10:19,387 - modelscope - WARNING - Using branch: master as version is unstable, use with caution
Downloading: 100%|██████████| 762/762 [00:00<00:00, 1.62kB/s]
Downloading: 100%|██████████| 71.0/71.0 [00:00<00:00, 212B/s]
Downloading: 100%|██████████| 98.9M/98.9M [00:05<00:00, 18.1MB/s]
Downloading: 100%|██████████| 98.9M/98.9M [00:12<00:00, 8.02MB/s]
Downloading: 100%|██████████| 117/117 [00:00<00:00, 400B/s]
Downloading: 100%|██████████| 26.5M/26.5M [00:01<00:00, 17.0MB/s]
Downloading: 100%|██████████| 57.6M/57.6M [00:02<00:00, 22.3MB/s]
Downloading: 100%|██████████| 143/143 [00:00<00:00, 475B/s]
Downloading: 100%|██████████| 57.6M/57.6M [00:05<00:00, 10.5MB/s]
Downloading: 100%|██████████| 139M/139M [00:06<00:00, 24.1MB/s]
Downloading: 100%|██████████| 859M/859M [00:25<00:00, 35.9MB/s]
Downloading: 100%|██████████| 346/346 [00:00<00:00, 1.23kB/s]
Downloading: 100%|██████████| 814M/814M [00:40<00:00, 21.3MB/s]
Downloading: 100%|██████████| 309/309 [00:00<00:00, 1.03kB/s]
Downloading: 100%|██████████| 1.88k/1.88k [00:00<00:00, 7.06kB/s]
Downloading: 100%|██████████| 7.66k/7.66k [00:00<00:00, 31.4kB/s]
Downloading: 100%|██████████| 4.16k/4.16k [00:00<00:00, 16.9kB/s]
Downloading: 100%|██████████| 438k/438k [00:00<00:00, 1.10MB/s]
Downloading: 100%|██████████| 329k/329k [00:00<00:00, 781kB/s]
Downloading: 100%|██████████| 10.8k/10.8k [00:00<00:00, 33.8kB/s]
Downloading: 100%|██████████| 51.8M/51.8M [00:03<00:00, 16.5MB/s]
Downloading: 100%|██████████| 51.8M/51.8M [00:07<00:00, 7.52MB/s]
Downloading: 100%|██████████| 460/460 [00:00<00:00, 1.74kB/s]
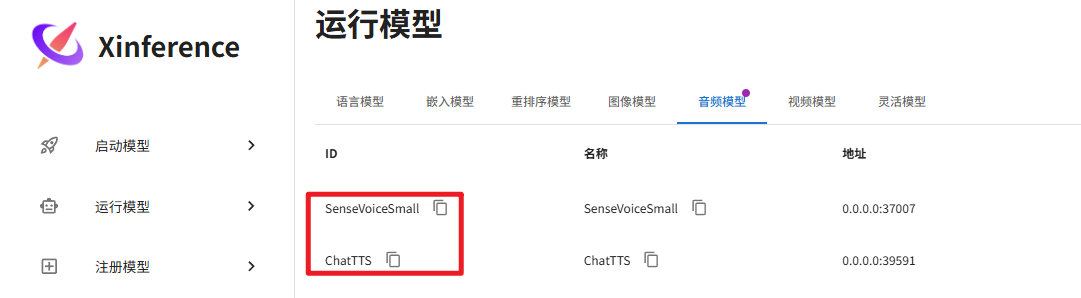
至此,ChatTTS、SenseVoiceSmall 在本地就部署完毕。
2. 语音模型使用
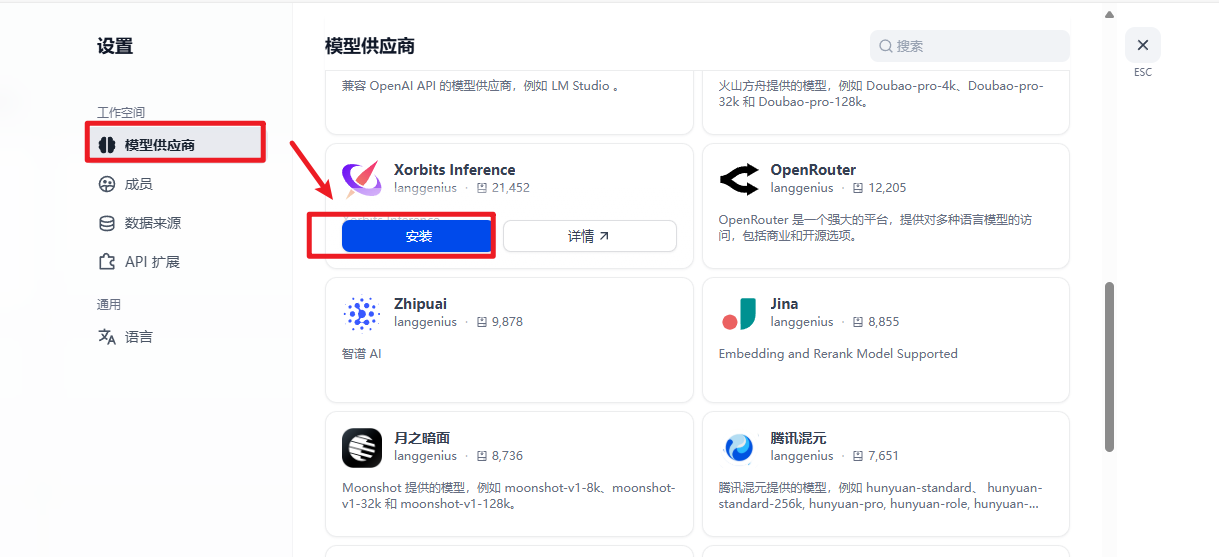
语音部署完毕之后,接下来打开 dify web 操作页面(我使用的是 1.0.1 版本),先增加模型提供商 Xorbits Inference 用于对接 xinference 部署的模型,如下图所示:
# 注意下面命令操作需要切换到下载的 dify 的 docker 目录下操作

# 启动 dify
docker compose up -d

# 停止 dify
docker compose down
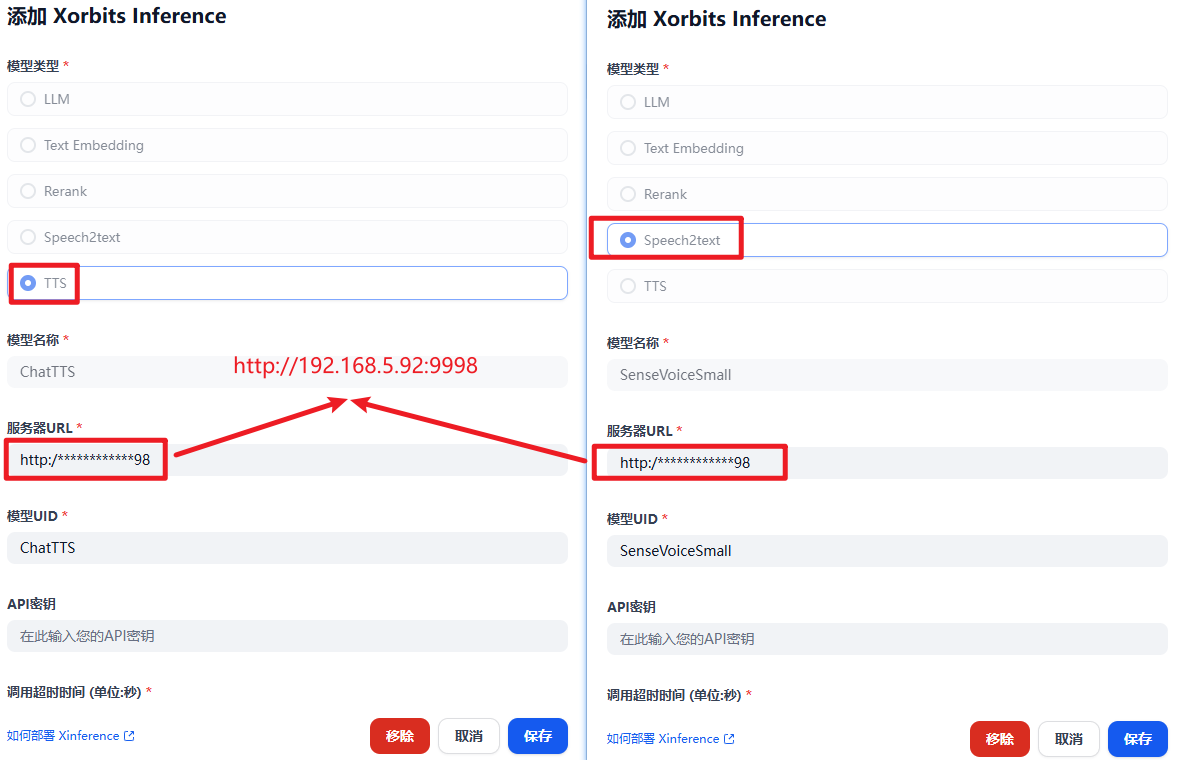
接下来点击 Xorbits Inference,添加模型,配置两个语音模型,如下图所示:
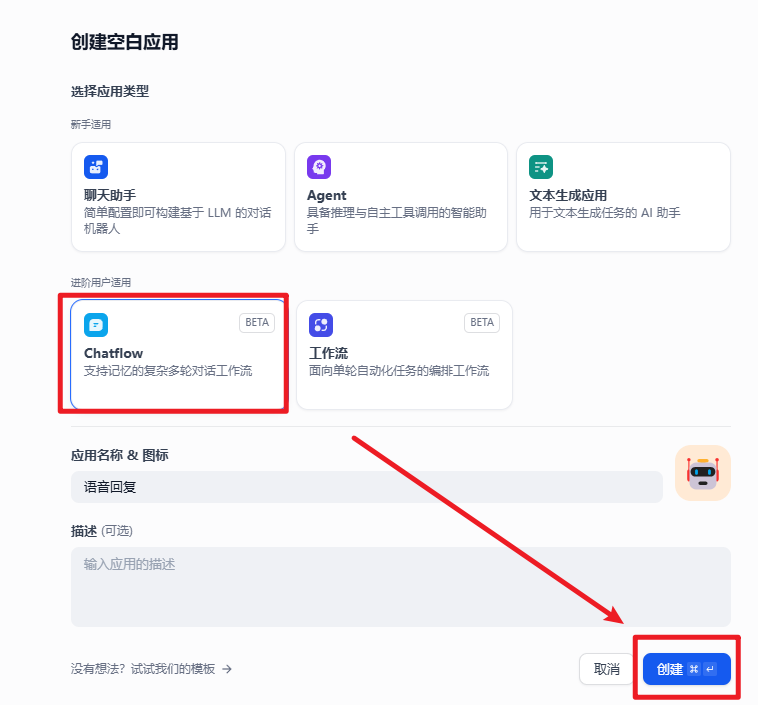
接下来,创建一个默认的 ChatFlow 项目,如下图所示:
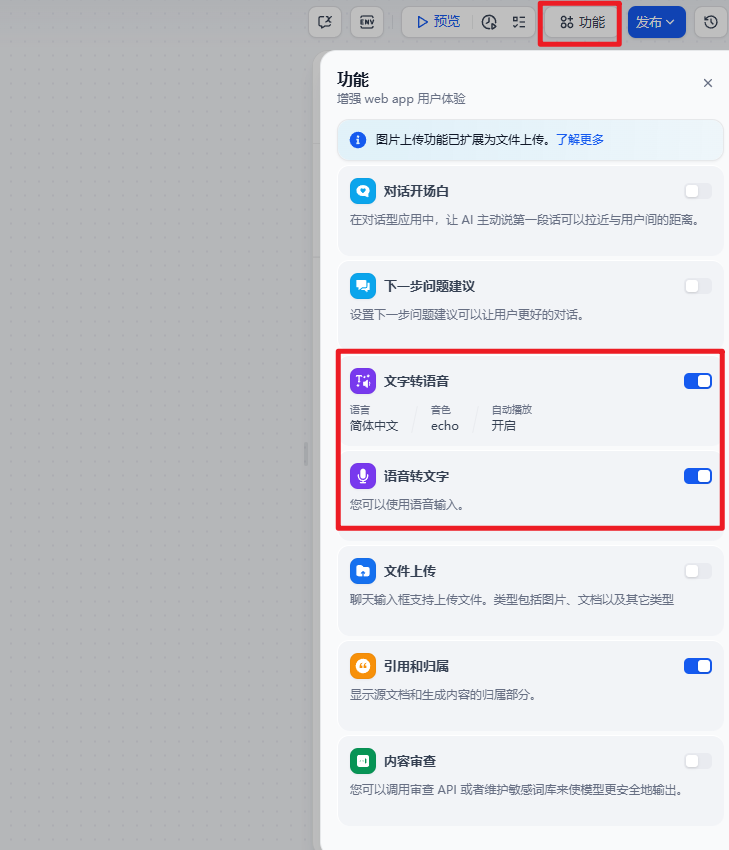
创建完成之后,不需要额外的工作流设计,默认就行,然后配置用于输入和输出语音模型。
点击发布按钮(注意:一定要先点击发布),接下来点击预览,输入聊天内容,当模型回复时,自动调用 ChatTTS、SenseVoiceSmall 模型进行语音的输入和输出。

 冀公网安备13050302001966号